
To quote Steven Stills, "Well there's things I am and there are things I'm not..." I don't think of myself as generally being good with a needle and thread. Boat tailor? I guess that's now a "thing that I am". Let me just say, there is a lot of needle and thread work in the boat on the right.
First, I have to say, the process of skinning the kayak was not difficult once we had things all figured out. It is time consuming and what information that I found was somewhat poorly illustrated or explained. I think it has a lot to do with the fact that it's something that you really need to see.
In our case, the process started out with the frame. For finish on the frame, we opted for a polyurethane finish as opposed to an oiled finish as some people choose to do. We then applied wax to the frame (I refer you to my previous bout with Murphy...) and polished it. The reason for waxing the frame is so the fabric not to stick to the frame when coated after skinning. At any rate, we started with the frame upside down:

We then used a piece of 8 oz Dacron cloth to cover the boat. The Dacron was selected over Nylon because it will shrink a bit when heated which lets you get wrinkles out at the end of the process - more about that later. We simply folded it in half length-wise and laid it over the hull to center it. We then used some thumbtacks to keep things in position. We then pulled down a bit and tacked at the sheer clamp on both sides - on the bottom in the image below. We then basted the cloth together at both the stem and stern to make a small, temporary pocket at either end while the cloth was being pulled tight from stem to stern. (FYI : This cloth is available from George Dyson at Dyson, Baidarka & Company in Bellingham, Washington. Mr. Dyson does most of his business by phone and is easily found with a web search. He does have a Facebook page with contact info, but not a web site. )

We then rolled the boat right side up. For the next step, there are no pictures because our hands were full. I can probably explain it better, anyway. We took a long thin strip of wood - 1-1/4" wide and 1/8" thick and as long as the boat. This was temporarily lashed to the top of the frame and carefully centered. We then pulled the fabric from one half of the boat over the strip and cut the fabric along the far edge of the strip from one end of the boat to the other. This meant that I wound up with a piece of fabric that was half the width of the boat plus 3/4 of an inch. We then used a small butane torch to melt the edge of the fabric so that it would not fray. We then repeated the process for the other side of the boat. Note that whenever you cut the fabric you should always seal the edges.
At this point, I was concerned that the amount that we would not get the fabric tight enough. I was also concerned about avoiding excessive pulls in the weave as it is a fairly loose weave. We'd seen some pulling around the thumb tacks if we tried to stretch the fabric too hard or un-evenly from side to side. To avoid pulling too many large holes, we opted for a method that many others have used. They sew a piece of nylon line into the edges so they can pull on the nylon line, not the fabric. This distributes the tension and gives a neat, finished appearance to the deck seam.
To do this, we cut two pieces of braided 1/8" nylon line that were just longer than the boat. Using small brads, we tacked them at the very tip of the bow, centered, but about 3/8" apart. Pulling tightly, we then tacked them - again, centered, but 3/8" apart at the stern. I then used hemostats (locking clamps picked up at a local "bargain store") to spread the lines at the front and rear of the cockpit opening to about 5/8" wide. This resulted in the line spacing being "tapered" from center to ends. The logic here is that we will fold the cloth over the top of the line so that we wind up with a deliberate gap. As we stitch the two halves together, the cloth is pulled tight, closing the gap at the same time.

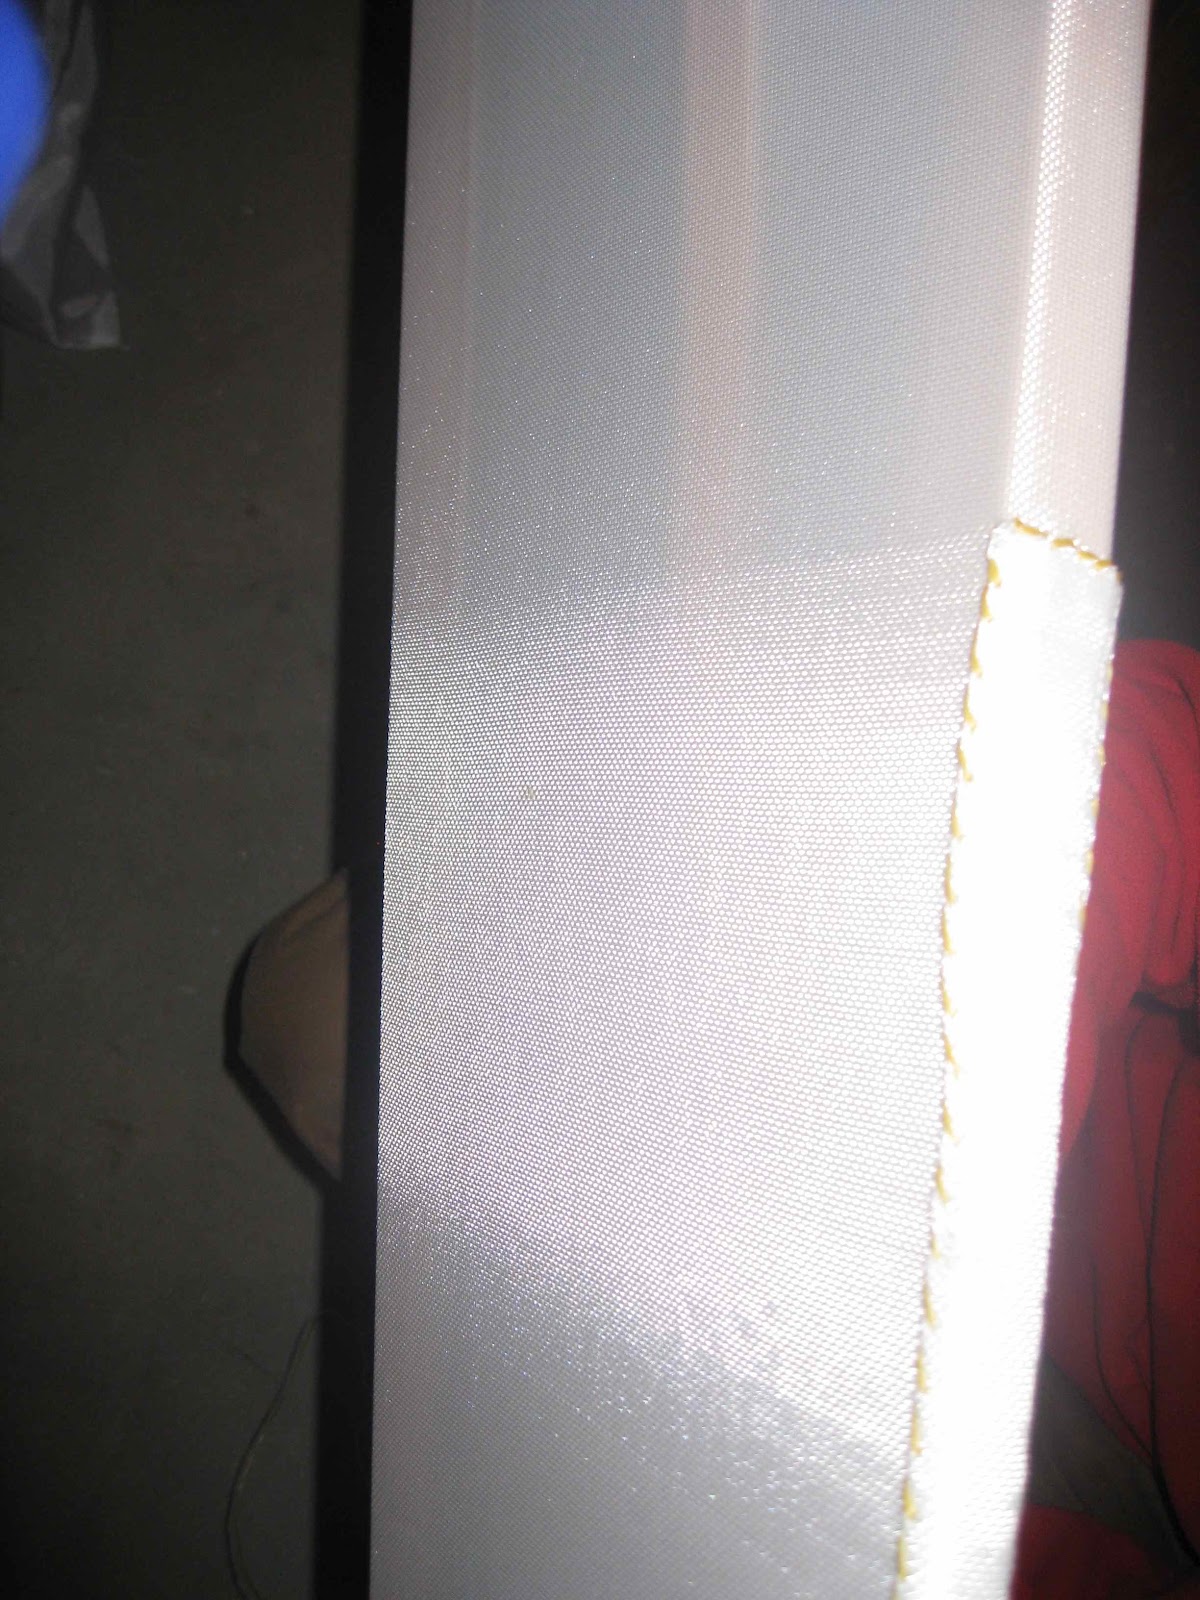
The cloth is wrapped over the line and basted with a running stitch using a straight needle. Because we didn't want the stitches to show, we used white Dacron thread. The stitches are about 1/4" long and very tight to the line. This was done on both sides from the edge of the cockpit opening to the bow and from the cockpit opening to the stern. Note the gap between the two sides here.

To stitch the deck together I opted to get waxed artificial sinew. It's available from leather working and craft shops. It is a synthetic thread with high strength and is available in a variety of colors. I bought "natural" which is a yellowy-tan.
The deck stitching is accomplished with curved needles. I think it would be either nearly impossible, or simply very difficult with straight ones. Be sure to get needles with a large eye as the waxed sinew is challenging to thread through the needle.

Starting about 1/2" back from the bow, I took a single length of the sinew with a needle at each end and came up from the bottom of the fabric just passing through the outside edge of the nylon line. on both sides. This hid the start under the fabric. You then start stitching diagonally across the gap, staying just on the outside of the nylon line (so the needle touches it!) You repeat with the other needle and you get a crossed pattern like this:

The stitches are about 3/8" long. You can see at the top of the picture how it pulls the fabric together. You can also just make out the turned under edge of the cloth on both sides of the seam. This cross stitching stops about 1/4" inside the cockpit rim (when put in place) You pull the gap up tight as you're stitching. The final stitches should go through the nylon line to hold things in place. This prevents the fabric from sliding along the nylon line. This process was repeated from the stern to the back of the hatch rim.
Ahh... The hatch rim and coaming. We drilled a series of small holes - big enough to pass the needle and thread - about 1" apart all the way around both the hatch rim and the coaming 3/8" up from the bottom. We located the rim and the coaming at the edges of the cross hatch and noted that there would be a small - maybe 4" section of center seam between the coaming and the hatch. We stitched it so it just came 3/8" into both the hatch opening and the coaming opening, stitching through the nylon line at either end. To re-cap here, we've got three sections of the deck seam completed so they end 3/8" inside the frames for the hatch and coaming.
We then cut the fabric at the stem and stern leaving 1/2" extra fabric. The brads holding the nylong line and the basting stitches were removed and the edges were tucked inside the hull along the sides of the stem and stern being careful to keep a straight edge along the stem forms about 3/8" apart. Starting where the cross-stitching ended at the tip of the deck, I cross-stitched the folded edges of the fabric together until I reached the end of the cut. The bow is shown below:

The problem here is that this seam is now exposed and is a weak area that will get abuse from grounding. This area was reinforced with a piece of the Dacron fabric with a simple hemmed edge on both sides, yielding a 3/4" wide tape. Starting on the deck about 3" behind the bow, this tape was whip-stitched to the fabric all around the edge. When the bow was reached, a 4" long loop was incorporated and then the strip was stitched to about 4" past the end of the seam below. The end result looks like this:
Contrast is a bit difficult, but you can just make out the seam around the edge.
Putting in the hatch and coaming rims is the hardest part of the process. You carefully put the frame in place centering and aligning it on the boat. It is then clamped in place with ratcheting strap (like for your roof-rack) around the hull, pulling it downwards to the frame. You cut the nylon lines in the middle of the opening. You then pull the fabric up along the inside edge of the rim, clamping the fabric to the rim as you go. At this point, ti may be necessary to cut the fabric to allow you to pull it up at the edges. To do this, cut radially from the center outwards in several places making sure not to cut closer than 1-1/2" to the rim. It helps to work symmetrically from side to side cutting and clamping to avoid causing the rim to move. Once you're happy with the result (minimal tension and wrinkles) you use the artificial sinew and a straight needle to sew the fabric to the rim with a running stitch through the holes. I then cut the edge of the fabric leaving an inch or so above the basted line and sealed the edge. The ends of the nylon line are also trimmed right where the deck seam ends. It looks like this:

Taking a small section of the nylon line, the extra flap of fabric is folded over the top of the line and basted in place like with the deck fabric. It now looks like this:

Now, I go around the cockpit rim at least twice. Stitching around the rope supported edge of the fabric as I go using a straight needle, pulling the edge up as I go. Sometimes you need to use the needle as a lever to pull the edge up. The final result is this:

Once this is completed for both the cockpit rim and the hatch rim - that is if you're installing a hatch - it's time to shrink the fabric. For this step a household steam iron and a meat thermometer were used. The thermometer was to tell the temperature of the iron's sole. The iron was filled with water and turned to a setting that yielded a sole temperature of 250°F. Running the iron over the fabric and dispensing steam, the wrinkles were taken out of the fabric. Once most of the wrinkles were gone (there were a few stubborn ones at the coaming edge...) the iron was re-set to a sole temperature of 350°F to shrink the fabric. Starting with the bottom, we ran the dry iron over the fabric. I kept hitting the fabric to listen to changes in the tension. I didn't want to over-tighten the fabric and cause holes to open in the stitching. I just wanted the fabric to be tight on the frame.
At this point, the fabric will be sealed with oil-based polyurethane and deck fittings installed. It won't be long before they are ready to paddle.
I should point out here that the skinning process was not instantaneous. It took two people several two and three hour evenings of work to complete. Just be patient and keep at it!


No comments:
Post a Comment